Showing posts with label Food. Show all posts

Sunday, 20 January 2013

Marmalade Making

I spent last weekend peeling, chopping, squeezing, boiling and decanting. The result was 11 jars of homemade marmalade, and quite delicious it is too! I had never made marmalade before, and there were no shortage of recipes to choose from - it seems that marmalade recipes are, quite rightly, a great source of pride to their authors, having been honed and refined every January, year after year. Everyone seems to more or less agree on the proportions - 1 part Seville oranges, 2 parts water, 2 parts sugar and about 1 lemon per kg of oranges. It's the method that causes disagreement - to cut the orange peel chunky or to shred it finely? To soak overnight or boil the oranges whole? To set the preserve to a firm jelly or leave it a little runny? It's a minefield for a marmalade novice like myself, but after a certain amount of research I decided to follow Nigel Slater's Recipe from his 'Kitchen Diaries II', along with occasionally consulting Dan Lepard's in-depth discussion of the method and science of marmalade making.

Seville oranges, the bitter variety that we need for marmalade, are in season during January and early February. It's worth seeking out organic, unwaxed fruit (not hard to find - Waitrose stock them, and I'm sure any decent greengrocer will too) as you are going to be using the peel as well as the pulp. I got particularly lucky when I bought mine - the cashier decided that because they were knobbly and green-tinged they must be a bit dodgy, and try as I might to explain that they were a special type of orange she insisted on giving me a discount on them. If you insist! Golden granulated sugar seems to be the sugar of choice, with some people adding a little black treacle at the end of cooking to produce a characterstic dark coloured preserve. You don't need jam sugar with added pectin, because the oranges (specifically the pith and pips) naturally contain enough pectin to set the marmalade.

Anyway, the method involved first peeling your oranges (10 of them) and lemons (2 of them):


Then chopping up the peel to your desired thickness. This is probably the most labour-intensive part of the process - it took me over half an hour to chop up all the peel, but it does fill the kitchen with wonderful citrus scents.

Chop chop!

The peel then goes in a bowl (or two bowls if, like me, you don't own a bowl big enough) along with 2.5 litres of water, the squeezed juice from the fruits, the pulp (chopped) and the pips (tied up in a muslin bag). This gets left to soak for 24 hours, to release the pectin from the pith and pips.


The next day, the peel, pulp, pips and water get transferred to a pan and boiled for about 2 hours until the peel is soft enough to squish between two fingers. After that, the bag of pips is removed, the sugar is added and the mixture is boiled (skimming off any froth that bubbles up) for 15-45 mins until set (this is tested by putting a tablespoon of the mixture on a saucer and chilling in the fridge for a few mins - if it forms a skin it's ready. Alternatively, use a sugar themometer - the setting point is 105C). When the marmalade boils it does tend to froth up, so you must have a big enough pan so that it won't bubble up over the sides, burning your hands and ruining your hob - I decided my stockpot wasn't quite big enough so I made the marmalade in two batches, straining the peel (but reserving the liquid) after the initial 2 hours of boiling, weighing out the peel and liquid into half quantities. Bit of a faff, so perhaps a big preserving pan might be a good investment in future! Once the marmalade has reached setting point, it's a good idea to leave it for 10 mins so that the peel is evenly distributed throughout the preserve.
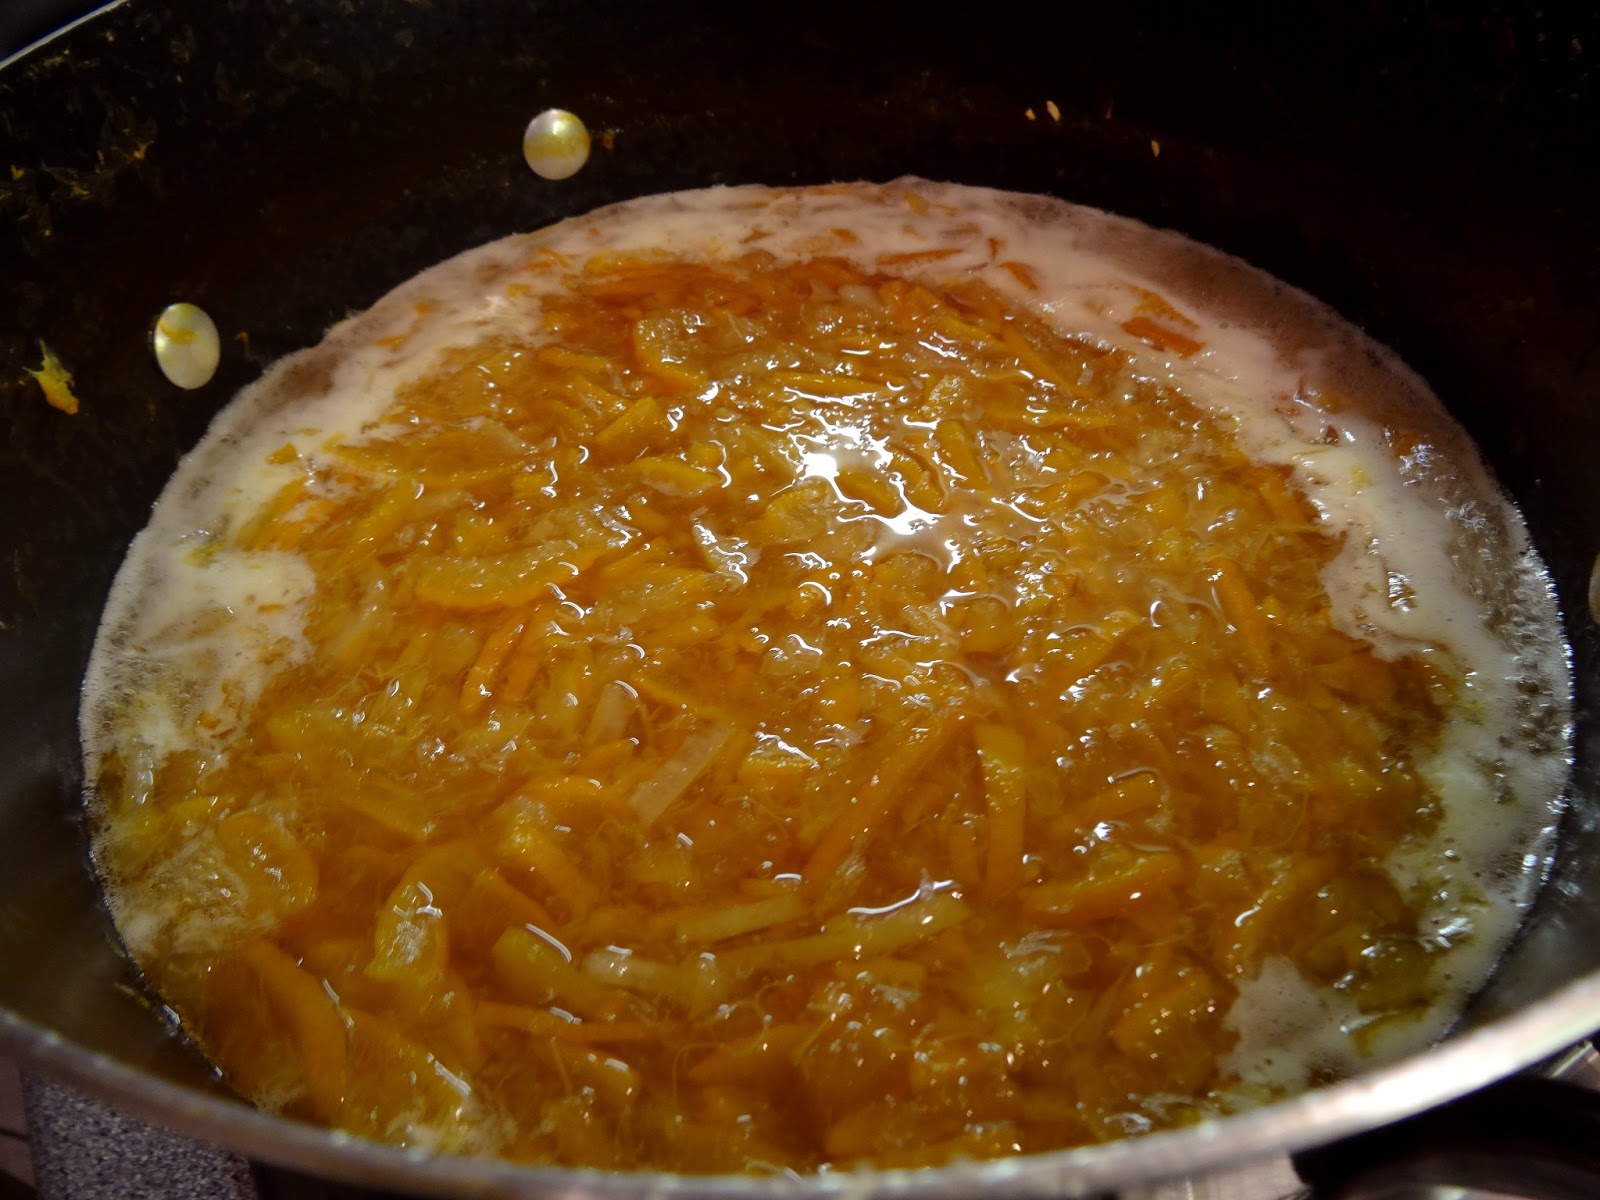
Marmalade comes up to the boil

Finally, the marmalade is decanted into sterilised jars, and left to cool. After that, all you have to do is look forward to breakfast the next morning!
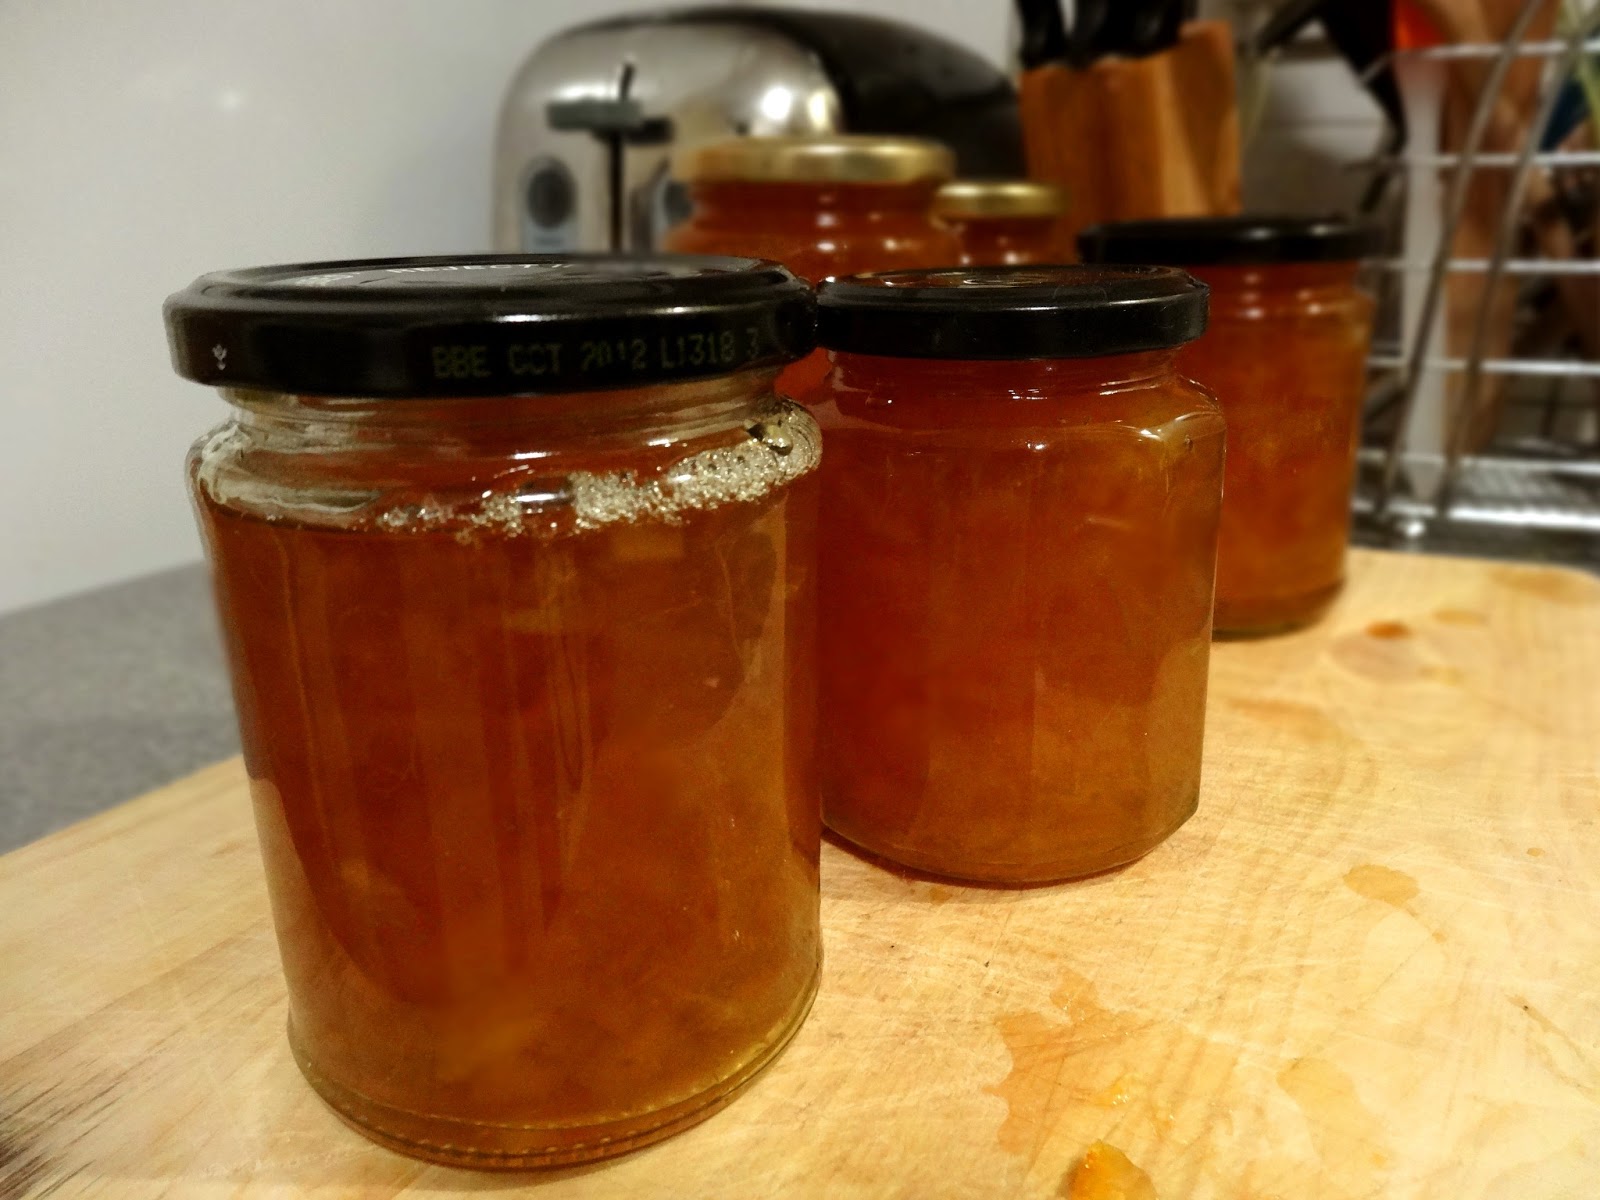
Done!

Sunday, 13 January 2013

Ricotta & Sundried Tomato Ravioli

Making use of another Christmas present here - my new ravioli press! I've been making occasional batches of fresh pasta for the past year using a pasta roller. The process takes a while, but it's very good fun working the pasta dough through the roller as it gets thinner and thinner. I still use a lot of dried pasta, but when I have the time it's very satisfying to make my own, and cut it to whatever shape/thickness I want. The basic recipe for pasta dough is very simple, involving only two ingredients - flour (tipo 00) and egg. Roughly 100g flour to one egg (multiplied as required), kneaded, rested and then rolled out. For ravioli, you want quite a thin pasta sheet - rolled out to setting 8 on your machine - as it will be doubled up when you assemble them. If you don't make your own pasta, then I'm sure you could still have good results if you buy sheets of fresh pasta to make ravioli with. Provided, of course, that you have a ravioli press!


Serves 2

For the Ravioli:

150g fresh pasta, thinly rolled out
100g ricotta cheese
50g sundried tomatoes, finely chopped
1 egg, beaten
parmesan
parsley, finely chopped
salt and black pepper

For the Sauce:

1 small glass of white wine
1 onion
2 garlic cloves
50g green olives
20g sundried tomatoes
2 tbsp double cream
parmesan
salt and black pepper

1) Arrange the pasta sheet on the ravioli press according to instructions. In a bowl, combine the ingredients for the filling, only adding as much egg as you need to bind it all together. Spoon the mixture into the ravioli, filling them completely to avoid any air bubbles forming.


2) Place the other half of the pasta sheet on top and roll over it with a rolling pin to seal. Turn the ravioli out.


3) Get a large pan of salted water boiling rapidly. Meanwhile, sweat the onion in a little oil until soft but not browned, add the garlic and fry for a minute then add the wine along with the olives, sundried tomatoes, a good sprinkle of grated parmesan and some salt and pepper. Allow the wine to bubble and reduce, then add the cream and heat through for a minute or so. Cook the ravioli in the boiling water - they should pop up to the surface after a minute or so. Cook them for a further couple of minutes then remove from the water and let them steam dry. If the sauce is too thick, add a little of the cooking water, then serve with a grating of parmesan and a grinding of black pepper.


Home-Baked, Stone-Baked Pizzas

It was an extremely successful Christmas as far as kitchen equipment goes - amongst other things we now have a mixer, a mincer, a ravioli press, a proper carving knife and, perhaps most exciting of all, a baking stone (from http://hobbshousebakery.co.uk/) for all my bread baking exploits! A baking stone essentially gives you that stone baked effect in a normal oven. It absorbs heat much better than a baking tray and therefore gives the dough more of a lift when it goes into the oven, allowing it to rise more as the air pockets expand. All of this means that as well as great loaves, I can now make proper pizzas with a crispy, blistered base:

Couple of stone baked white bloomers


Just like Mama used to make....

To make 2 pizzas I use:

125g Strong White Bread Flour
125g Plain White Bread Flour
3g Fast-action Dried Yeast
5g Salt
160ml Water
1 tbsp Olive Oil

In a bowl, combine the flours, yeast and salt, keeping the yeast and salt on seperate sides of the bowl. Add the water and mix with one hand until the dough starts to come together. Tip it out onto a clean surface, add the oil and knead for 5-10mins until smooth and stretchy. Form it into a round. Clean the bowl out, lightly oil it, place the dough in it and cover with clingfilm. Leave to rise for 1-3 hours. If you have a baking stone, preheat your oven to maximum well before you intend to bake, with the stone on the shelf in the top of the oven.


Ready for the oven!

Once risen, tip the dough out onto the surface, deflate it with your fingers and divide into two equal portions. Form each into a ball then roll them out to roughly 1-2mm thickness. Coat them well with semolina or polenta and place on a wooden board or a rimless baking sheet. Add your toppings (don't overcrowd it) and transfer either to your baking stone (the transfer can be a little tricky - make sure the pizza isn't too big for the stone, and that the base is well coated so that it won't stick to your board) or to a preheated baking tray. Bake for up to 10 mins - keep an eye on it, you'll know when it's done.

A word on toppings:

  • For a tomato base you can use tomato puree, but I think you get a much better depth of flavour if you fry a little garlic and thyme in olive oil, add a tin of plum tomatoes, mash them with a fork, add a bay leaf, salt and pepper, and a pinch of sugar and reduce down for 30 mins until you have a deliciously tomato-ey paste.
  • If you're using veg such as aubergine, courgette, pepper then it's nice to roast them for about 30 mins first - that way you get a nice caramelisation, and they lose a lot of their water content, meaning you don't get a soggy base.
  • When you've arranged your toppings, a little drizzle of olive oil will help get everything nice and charred.
  • I went for a classic Mediterranean style roast veg and buffalo mozzerella topping on this occasion, but sometimes it's good to think outside of the box - try some seasonal veg like kale or beetroot, or some local cheese - blue works great, as does goat's cheese.
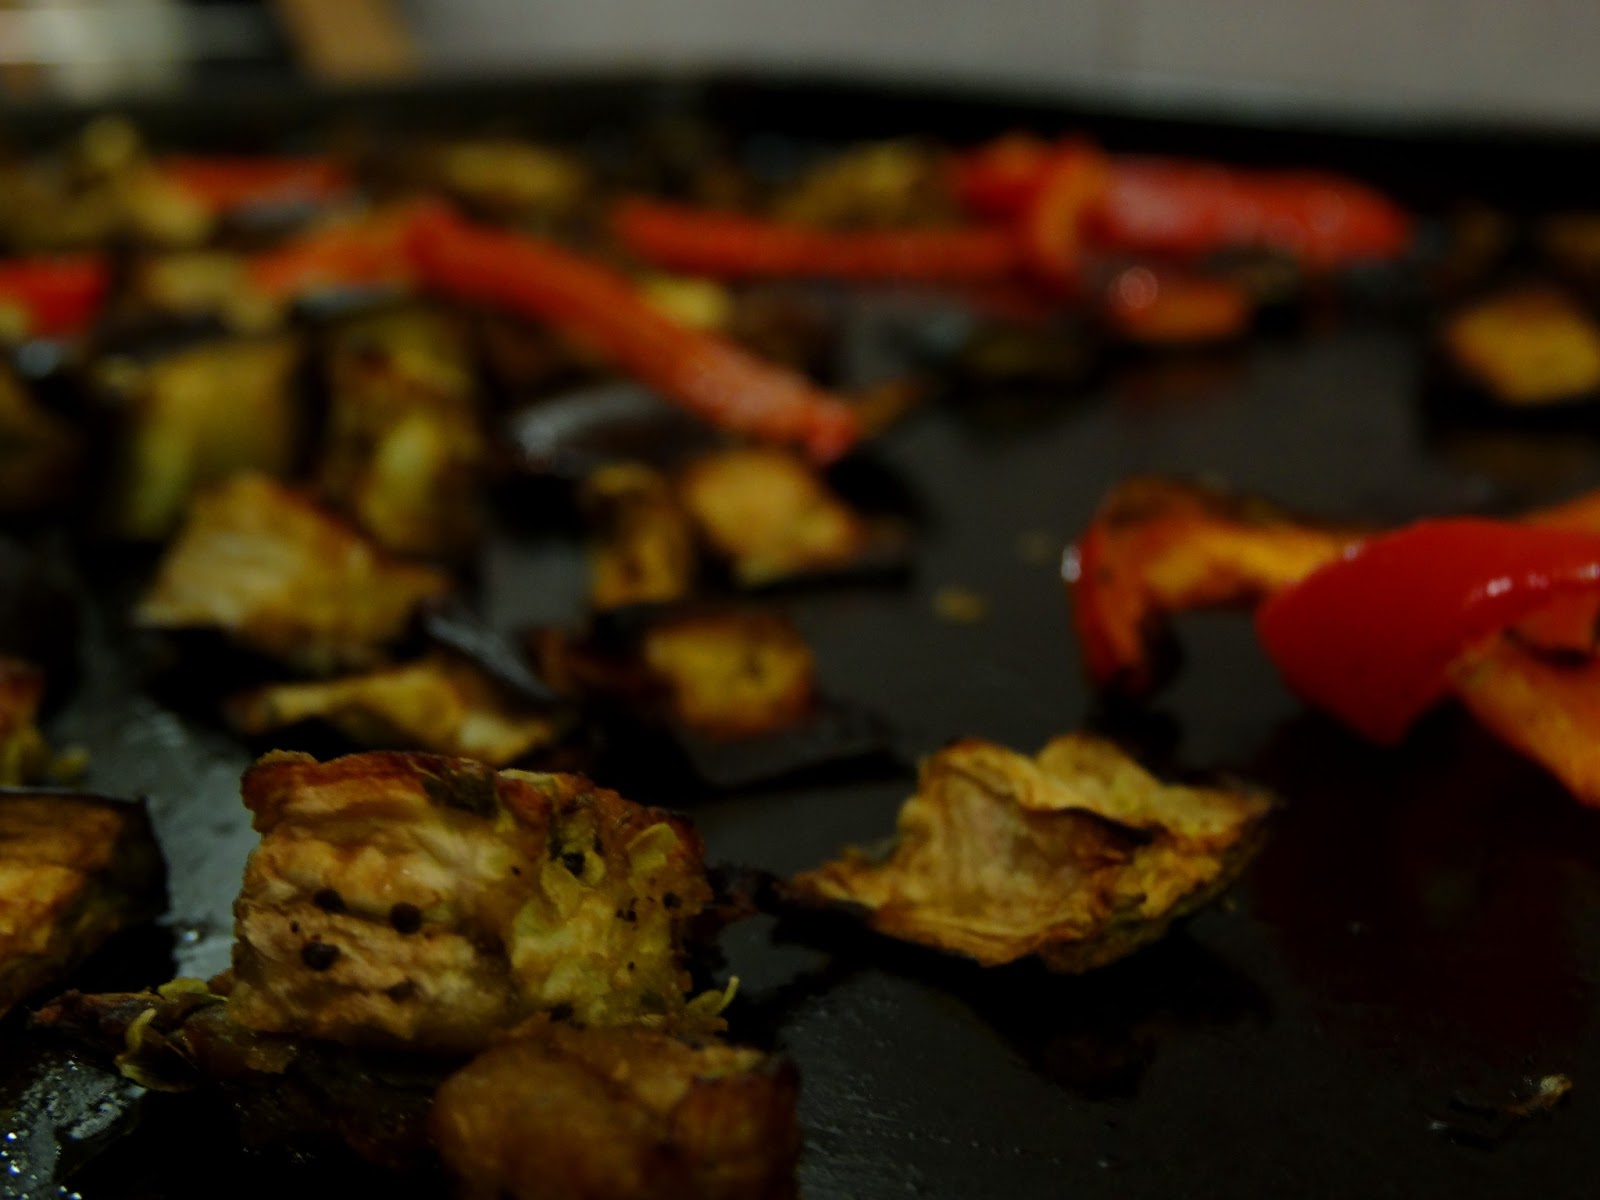
Aubergine and Red Pepper, pre-roasted


Saturday, 12 January 2013

Roast 'Middle White' Pork Belly


Pork belly is, undoubtedly, one of my favourite cuts of meat. When cooked properly, it offers us crispy, salty crackling, meltingly tender meat and a delicious layer of fat. However, as is always the case with meat, we must chose what we buy carefully. The quality of pork available to us in this country varies considerably – at worst we have pork imported from the EU, reared in conditions that would be illegal in this country (sows confined in stalls, unable to even turn around). That’s not to say that the standards in the UK are consistently higher – our cheap UK pork comes from pigs who are still reared intensively indoors on wooden slats, without even any straw for bedding. We’re talking about social animals of a similar level of intelligence to dogs here – pigs love rooting around in mud, and they like having their own space from time to time. Frustration in our intensively reared pigs often leads to them biting each other’s tails, and as a result it is common for piglets to have their teeth clipped and tails docked without anasthetic. All of this simply because we refuse to pay a few extra pennies for our bacon? Not for me thanks.
There is, of course, an alternative. The main labels to look out for if you want to buy pork from pigs that have had a happy life (and regardless of what you think about the ethics, there is no doubt that slow growing, traditionally reared pork tastes much better) are free range and organic. ‘Outdoor-bred’ and ‘outdoor-reared’ pork varies in welfare standards – the pigs still spend a large portion of their lives indoors, sometimes in less than desirable conditions. If you can, it is worth searching out a local producer of rare breed pork – these pigs are traditional breeds, shunned by commercial agriculture post-WWII when production intensified because they grow slowly, and don’t deal well with a life indoors. Without exception these rare breeds (Middle White, Gloucester Old Spot, Saddleback and more) taste amazing. They have more fat, which gives the meat flavour and keeps it moist during cooking. Happily, while it is fattier, it tends to contain more mono-unsaturated fat and less saturated fat than intensively farmed pork so is also a healthier option. A great number of small producers across the country are now specialising in rare breed pork – we get our middle white pork and bacon at our local farmers market (http://ravensworthgrangefarm.co.uk/). If you have a producer near you then I urge you to support them – without these producers the breeds would eventually die out which would be a great, great loss. Yes, it costs a little more than cheap supermarket pork but who cares? Eat less, and eat better quality.
Anyway, back to the roast pork belly:
Really easy to cook – make sure the skin is dry, and score it with a sharp knife (or get the butcher to do it). Rub plenty of salt into the skin, and a few aromatics if you fancy (crushed fennel seeds, coriander seeds, caraway…. etc.). Preheat your oven to maximum and roast the pork for about 20 mins until the skin crackles, then turn it right down to 160C and roast for a further 2 hours or so until the meat is very tender. I threw a loads of root veg, and a few segments of lemon and orange under the pork for the last hour of cooking. Rest the meat for at least 15 minutes once it comes out of the oven. Serve with the roasted roots and anything else you fancy. The meat should be so juicy that you don’t really need a gravy. Makes great leftovers for sandwiches, stir frys, salads etc.
In other news, a trip to the farmers market this morning yielded a pheasant, a woodcock, roe venison strip loin, 2 pigeon breasts, 2 guinea fowl breasts, 2 middle white pork chops, 2 packs of middle white bacon, middle white chipolatas and 4 pig kidneys. Should keep us going for a month or so!

A Salad of Jerusalem Artichokes, Cabbage, Mushrooms and Hazelnuts

A nice winter salad this one – Jerusalem artichokes arrived in our veg bag this week, and a bit of googling tells us that they are not, in fact, an artichoke, nor are they from Jerusalem – they’re a member of the sunflower family. The knobbly tubers are similar to potatoes, but much harder to peel because they’re so god-damn knobbly. Quite an unique taste – sweet and distinctively nutty, in the kitchen they behave much like potatoes. You can boil ‘em, roast ‘em, gratinate ‘em, mash ‘em and probably even make chips with ‘em. I opted for the par-boil and roast option (along with a few fat cloves of garlic), roasting for about half an hour til they turned a bit crispy and caramelised. Team them up with some lightly boiled savoy cabbage, some slowly sautéed onion and mushroom, some toasted hazelnuts (half of them bashed until they crumble), a good dressing of olive oil and apple balsamic, and a warm slice of buttered toast and you have a light, unusual, and really rather classy supper.


The only thing to bare in mind here is that jerusalem artichokes, while delicious, rival even swede and baked beans with their ability to make you fart. Not necessarily a problem in my book, but if you’re expecting company then perhaps they’re not the veg of choice…..

Gnocchi with a Mutton, Orange & Parsley Ragu


This rich, warming pasta sauce was an improvisation, but one that seemed to work very well! I served it with homemade gnocchi, following this recipe, but there would be no shame in using decent ready made gnocchi, or serving it with pasta. The skins from the (baked) potatoes required in the recipe were served up as a little ‘antipasti’ – I spooned a little ricotta into each half and grilled them for a few minutes until crispy, then drizzled them with a little olive oil and balsamic…. Nothing Michelin-starred about it but it always feels good not to waste anything in the kitchen!
To do this justice you need good quality mince (I used mutton, but lamb or good quality beef mince would work too) and a decent, drinkable, red wine, as it forms the base of the sauce. ‘Cooking’ wine has no place here!

Mutton, Orange & Parsley Ragu
Serves 4, with pasta or gnocchi


400g mutton or lamb mince
2 onions (red and brown), thickly sliced
2 sticks of celery, diced
1 carrot, diced
1 leek, diced
5 cloves of garlic, bashed
1 tsp dried oregano
4 tbsp tomato puree
2 glasses of red wine
1 bay leaf
1 cinnamon stick
1 star anise
1 orange
a bunch of flat leaf parsley, chopped
apple balsamic vinegar
olive oil
salt & black pepper
1 Heat a little olive oil in a large pot. Brown the mince, seasoning with plenty of salt and black pepper. If the mince releases a lot of fat, skim most of it off, leaving approx. a tablespoon (save the fat you have skimmed off for the next time you cook roast potatoes etc.). Chuck in the onions, celery, leek and carrot and fry until the onion is soft. Add the oregano and tomato puree, fry for a further couple of minutes. Add enough wine to cover everything, and let it bubble for a few minutes. Add the bay leaf, cinnamon stick, star anise and thinly pared zest of the orange to the pan, and a splash of water to cover.
2 Leave to simmer on a low heat, partially covered, for at least an hour, adding a little water if it starts to dry out.
3 Add the chopped parsley, the juice of half the orange, a good splash of balsamic vinegar, and salt and pepper to taste. Adjust the seasonings as appropriate – you want a good balance between sweetness (orange), acidity (balsamic vinegar) and salt. Remove the Bay leaf, cinnamon stick and star anise. Serve with gnocchi or pasta, top with some good ricotta cheese and more parsley.

Purple and Green Stir Fry

We were delighted to get a purple cauliflower in our local organic veg delivery this week:


The taste isn’t vastly different to that of a normal white cauliflower, but it’s fantastic to look at! From an aesthetic point of view it would seem a crime to smother it in cheese sauce, so instead I decided to use it in a stir-fry with some autumn greens – far more artistic!


1 Purple Cauliflower, broken up into florets
1 Red Onion, thinly sliced
1 Pak Choi, leaves and stalks seperated, shredded
1/2 a Green Chilli, finely chopped
1 Clove of Garlic, sliced
1 Tbsp Sesame Seeds, lightly toasted in a dry pan
Good quality Chilli & Garlic sauce
Peanut butter (I actually used some homemade cashew nut butter – cashews, sunflower oil, salt and honey, blended together, but peanut butter would also work)
1 tsp Sesame Oil
1 tsp Soy Sauce

First make the sauce – mix the chilli sauce, nut butter, sesame oil and soy sauce. Taste and adjust – add more of each component until you hit on a balance you’re happy with. Steam the cauliflower florets for 5 minutes until tender but still ‘al dente’. Set aside. Heat a tbsp of sunflower oil in a hot wok, add the red onion and the stalks of the pak choi. Stir fry for a couple of minutes. Add the garlic and chilli, fry for a further minute. Add the cooked cauliflower and the leaves of the pak choi, stir fry for a further minute or two until the leaves begin to wilt. Stir in the sesame seeds and the sauce, allow it to heat through then serve, either with rice (egg-fried if you fancy) or noodles.


A healthy, tasty, quick, and colourful meal for a chilly November evening. Just a shame we’re not sophisticated enough to know how to use chopsticks…..

A whole chicken goes a long way....

The 2.2kg organic free range chicken we got at the farmers market earlier this month has yielded us 8 extremely generous portions, and 2 litres of the most deliciously chicken-y tasting stock I’ve ever made. I jointed the chicken after we bought it, the 2 breast portions made the ‘chroizo stuffed chicken breast’ from our previous blog, while the legs and carcass went in the freezer. We used the leg portions this week in an oven baked chicken curry – vaguely following this recipe. I added some chopped fennel and missed out the chopped tomatoes, using some tomato puree instead for a thicker sauce. The results were great – chicken leg meat is, in my view, far more delicious than breast meat and the crispy, salty skin makes it so much more interesting than the bland chunks of anonymous meat you get in the average takeaway. We ate it with some cous cous and roasted veg that we had leftover from a previous meal.


The chicken carcass, a few days later, was roasted along with cubed swede, celeriac, carrot, onion and whole garlic cloves until the remaining meat on the chicken was cooked through, and the veg were slightly caramelised in the lovely juices from the chicken. An amazing amount of meat came off the carcass, so we ate half of it with the roasted veg, some pearl barley and cabbage for dinner:


The leftover chicken and veg was then fried up the next day for lunch, with some crusty bread:


….So there we go – 4 meals each from 1 large chicken, and a couple of litres of finest stock in the freezer.

Squash, Apple and Cider Soup

A real seasonal bowl of soup this one – and a result of consulting several different soup recipes involving pumpkins/root veg and cider. I used a couple of small harlequin squashes, and a cooking apple, with onion, garlic, allspice, ground ginger, nearly a whole bottle of organic dry cider and enough stock to cover the veg. Caramelising the onion at the start rather just sweating it seemed to add a nice flavour. When the squash was soft the soup was blended, cream stirred in and garnished with cox apple slices, fried in a little oil and butter until brown, and then seasoned with a little cinnamon and a pinch of brown sugar.


Pigeon Breast, Pearly Barley with Bacon and Leeks, Honey Roasted Carrots and Swede

I’d never cooked pigeon before – what a tasty bird! Similar to venison or lean beef (and, in my opinion, far more interesting than both) pigeons are a plentiful source of delicious meat, and cheap as a result – we picked up 2 ‘oven ready’ pigeons for £5 at the farmer’s market. You can cook pigeons on the bone, either roasted or casseroled, but I chose to de-breast the birds with a sharp knife (there’s not much meat other than the breasts themselves). The carcasses weren’t wasted though – they got 10 mins in a hot oven and then straight into the stockpot with carrot, onion, celery, leek tops, bay leaves, black peppercorns, parsley and thyme and simmered for a couple of hours. Half of the resulting stock was then used for the pearl barley and red wine sauce, the other half sits in the freezer awaiting further instructions!


For the pigeon:
2 wood pigeons, breasts only, carcasses made into stock

For the Pearl Barley:
200g pearl barley
A rasher or two of bacon
1 leek, chopped
1 clove of garlic, finely chopped
Some cabbage, shredded and blanched
Butter and rapeseed oil
Flat leaf parsley
Pigeon stock (approx. 400ml)
For the honey roast carrot and swede:
2 large carrots
1 swede
1 onion
Runny honey
Rapeseed oil
For the red wine sauce:
Half a glass of red wine
A splash of pigeon stock
1 tablespoon of redcurrant jelly
Dice the carrot and swede, thickly slice the onion, place on a baking tray, season well with salt and pepper and drizzle with rapeseed oil. Roast at 200C for about 45 mins or until the veg starts to caramelise. Meanwhile, for the pearl barley, slice the bacon into lardons and fry in plenty of butter and rapeseed oil. When it starts to brown, add the chopped leek and garlic, fry for a couple of minutes then add the pearl barley and stir to coat in the oil. Pour in about half the stock, cover with a lid and allow it to simmer. When most of the stock has been absorbed add a splash more, repeat until the barley is tender.
Get a frying pan on a high heat. Season the pigeon breasts with plenty of salt and pepper, and rub with rapeseed oil. Add a little oil to the pan and fry the breasts for 5 minutes, turning every minute or so. Remove from the pan and leave to rest on a plate, covered in foil. Keep the pan on the heat, pour in the red wine and stir to deglaze. Add in a ladelful of pigeon stock and a tablespoon of redcurrant jelly and simmer for about 10 minutes until reduced. Get the roast veg out of the oven and drizzle a little honey all over the veg. Return to the oven for about 10 mins until glazed. Add the blanched cabbage to the pearl barley, season with salt and pepper to taste, and stir in a knob of butter and some chopped parsley. Slice the pigeon breasts at an angle – they should be nice and pink in the middle. Serve on top of the pearl barley, scatter the honey roast veg around it and drizzle the pigeon with the reduced sauce from the frying pan.


I was really chuffed with this one – pigeon is an absolute delight, and the earthy, autumnal flavours of the barley and veg seem to complement it very well.

A Seasonal Mezze


One of the most interesting and exciting ways of eating is to present a number of small dishes – salads, breads, dips, roasted veg etc. – instead of presenting one plate with a piece of meat on it that demands your exclusive attention. We often eat this way, especially when the veg bag arrives full of beautiful, fresh, seasonal veg. Making a few small dishes, each focussing on a different vegetable seems a much better way of doing it justice than simply serving a couple of veg on the side of a bit of meat. That said, it does tend to take a little more time to prepare several little dishes than just one plate of food – it’s always a good idea to make more than you think you’ll eat so that you’re left with plenty for subsequent lunches or snacks, that way the extra effort feels a little more justified!
This Wednesday our ‘mezze’ consisted of:

Wraps (from Paul Hollywood’s ‘How to Bake’)
Roasted green pepper, red onion and cauliflower with ‘merguez’ spices (fennel seed, coriander seed, cumin seed, sweet smoked paprika, black peppercorns all bashed up together)
Cauliflower Pakora (from the River Cottage ‘Veg Everyday’ book)
Breaded, fried leeks (from Yottam Ottolenghi’s ‘Plenty’)
Guacamole
Sweet Chilli dip (redcurrant jelly, garlic, chilli, soy sauce, cider vinegar, spring onions, salt & pepper)
We ate the roasted veg inside the wraps with guacamole – almost like veggie fajitas:


The cauliflower pakoras are a particular favourite:

Cavolo Nero and Pumpkin Seed Pesto


Whenever I buy a pumpkin or squash I can never bring myself to throw away the seeds. They generally just sit in a bowl in the fridge, forgotten until my better half discovers them and suggests that maybe they’ve been there long enough, and that perhaps it’s time to throw them out. However, when I do get my act together, they get tossed in oil and salt and roasted for about 10 mins at about 180C. They end up wonderfully crunchy and tasty, a great snack as a healthier alternative to crisps. This time they got combined with the cavolo nero (or black kale) lurking in the fridge to make a lovely pesto. It required:
A good handful of pumpkin seed (toasted in the oven)
About 10 stalks of cavolo nero, or other kale
4 garlic cloves
The juice of 1 lemon
Extra virgin olive oil
Parmesan, to taste
Sea salt & black pepper
Shred the kale leaves from its stalks and boil for about 4 mins until tender. Drain it and run it under cold water to stop it cooking further. Squeeze as much water out of the kale as you can. Place the pumpkin seeds in a food mixer and grind to a coarse powder. Add the kale to the ground seeds along with the whole garlic cloves (peeled) and blend them in the mixer. Tip out into a bowl, add plenty of olive oil until you have a consistency you like. Squeeze in the lemon juice, finely grate some parmesan and season with salt and pepper. Taste and add more lemon juice/salt/pepper/parmesan/olive oil until everything is balanced.

It makes a really nice winter pesto. You could add parsley or basil although I imagine the punchy flavour of fresh herbs might over-power the subtle but delicious flavour of the kale itself. We ate it stirred through pasta with a few late season tomatoes.


Skin-on chicken breast stuffed with chorizo

The first Friday of every month is Newcastle farmers market. We tend to buy in bulk to fill the freezer for the month, and this month was no exception – we left with two grouse, an organic chicken, a joint of lamb shoulder, an Aberdeen Angus sirloin steak, rare breed pork ribs and chorizo spiced sausage, dry cured bacon, some local brie and some local organic veg including a couple of corn on the cob. We also signed up for 5kg of Scottish blackface mutton for £25 to collect next month, so expect some mutton recipes as of November!

 The free range organic chicken from http://www.northumberlandpoultry.co.uk/index.php is 2.2kg monster! It’d be silly to roast it for just the two of us so I decided to joint it, giving us two generous breast portions, two enormous leg portions and a carcass with a load of meat still on it. The carcass will be roasted, the meat stripped off (risotto? salad? sandwich? soup?) and the bones slowly simmered for the most incredible stock. These slow growing organic birds have strong, well developed bones that make the most delicious broth. They are simply a world away from the supermarket intensively farmed broilers, and I for one would rather eat a little of a good thing than a lot of something insipid, bland and morally questionable. The chicken breasts, with the skin left on, got stuffed with a little of the chorizo sausage meat, seasoned with sweet smoked paprika, salt and pepper and rubbed in oil. I browned them in a hot pan for a couple of minutes each side then finished them in a hot oven for about 20 minutes, on top of some veg (courgette, aubergine, onion, chilli and whole garlic cloves) that had already been roasting for about half an hour. I served the chicken with the roast veg and, for a little freshness, some tomato and spring onion tossed in sea salt, black pepper, olive oil and lemon juice. This was the result:


Tasty!

Welcome!


Having relocated from my previous wordpress blog, this page contains a handful of posts dating back a few months that I have copied and pasted, and new ones will appear on a regular basis. Here's a few words of introduction.....
Me, and my girlfriend Melissa, live in Newcastle. We don’t have a ton of cash to spend on food on a weekly basis – far from it, but we do believe that good quality food shouldn’t be the preserve of those with money to spare. Here’s a bit of a run down on where we tend to buy our food:
Meat – We eat meat on average 2-3 times a week, and when we do it’s from free range, often organic or rare breed animals. A monthly visit to Newcastle farmer’s market to stock up the freezer constitutes the bulk of our meat shopping – organic chicken, rare breed pork, local wild game, Northumbrian beef or lamb – the quality is almost always stunning. Yes, it costs slightly more than cheap supermarket meat but we eat less of it, never waste any, and enjoy the meat considerably more than we ever would if we were to eat cheap, intensively farmed meat every day. We seem to manage to spend around £20 each on meat per month.
Veg – We get a weekly large veg bag from the North East Organic Growers – £11 a week plus £1.70 for a side order of bananas and lemons. This seems to last us the majority of the week without much need for topping up on veg elsewhere. The variety of seasonal veg has been a real joy since we started the scheme and it’s the contents of the veg bag more than anything that seem to dictate our meals every week. Highly recommended!
Fish – We try and eat sustainably caught (and ideally local and freshly caught) fish on a weekly basis – not always easy to find in Newcastle itself although the fishmonger in Grainger Market sometimes has some nice fish. Mackerel is a favourite as are red mullet, squid, lemon sole – whatever looks good on the day. M&S seems to have a relatively extensive selection of prepackaged fish these days too, with the advantage that you can usually tell how fresh it is by looking at the use by date. It’s not local but at least supermarkets like M&S seem to be stocking more and more line caught, MSC certified fish.
Other stuff – Our local free range eggs tend to come from ‘Mmmm…’ Deli in Grainger Market (£1.25/half dozen) as does our bread flour and local rapeseed oil (£3.50 per refill). Cheese comes from the cheesemonger in Grainger Market, or the farmers market. Anything else we generally get at Waitrose, including the local Acorn Dairy organic milk and cream.
Shopping locally and not having to depend entirely on a weekly supermarket shop is a cost effective and healthy way to shop, and provided you’re able to find a spare half hour or so every couple of days to do your shopping it doesn’t require a huge amount of effort. It’s a lot more fun than pushing a trolley down the aisle of a supermarket, and I think the more we can enjoy the whole process of feeding ourselves – buying/growing the produce, cooking/preparing and, of course, eating it, the happier we’ll be. Certainly works for us anyway!